Arduino Nano ESP32 Distance and Servo System
About This Architecture
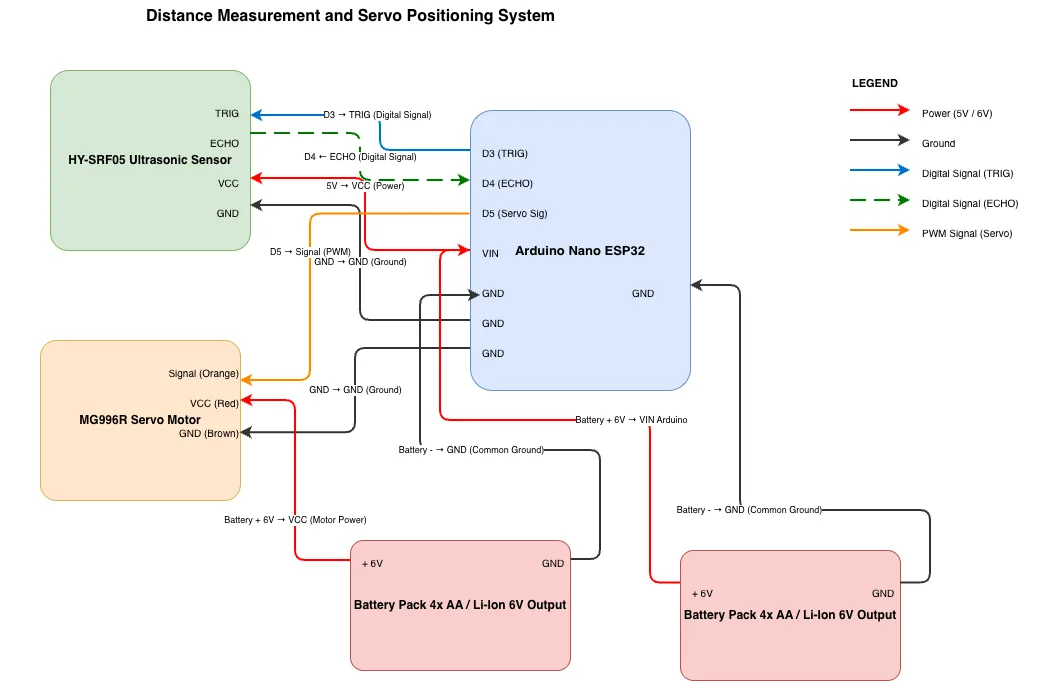
Arduino Nano ESP32 distance and servo system integrates an HY-SRF05 ultrasonic sensor for real-time distance measurement with an MG996R servo motor for dynamic positioning control. The Arduino Nano ESP32 microcontroller manages sensor input via TRIG and ECHO digital signals on pins D3 and D4, while PWM output on pin D5 drives the servo motor. A 6V battery pack powers both the servo motor directly and the Arduino board, with the 5V Arduino rail supplying the ultrasonic sensor independently. This architecture demonstrates practical sensor-to-actuator feedback loops essential for obstacle detection, robotic arm control, and autonomous navigation applications. Fork and customize this diagram on Diagrams.so to adapt pin assignments, add additional sensors, or document your own embedded projects.
People also ask
How do I wire an Arduino Nano ESP32 with an ultrasonic sensor and servo motor?
This diagram shows the complete wiring for an Arduino Nano ESP32 connected to an HY-SRF05 ultrasonic sensor via digital pins D3 (TRIG) and D4 (ECHO), and an MG996R servo motor via PWM pin D5. The 6V battery pack powers the servo directly while the Arduino's 5V rail supplies the ultrasonic sensor, enabling real-time distance measurement and servo positioning control.
- Domain:
- Electrical Engineering
- Audience:
- embedded systems engineers and hobbyists building Arduino-based robotics projects
Generated by Diagrams.so — AI architecture diagram generator with native Draw.io output. Fork this diagram, remix it, or download as .drawio, PNG, or SVG.